Have you seen how your microwave looks after many uses? It’s time to make it sparkle again. This guide will show you how to clean your microwave easily and quickly. A clean microwave improves your kitchen and helps avoid messes. Let’s make your kitchen chores simpler and find joy in cleaning. Ready? Let’s start!
Key Takeaways
- Understanding the importance of regular microwave maintenance for hygiene and efficiency.
- Discovering the most effective supplies for removing microwave grime and odors.
- Mastering the step-by-step guide to achieve a fresh and spotless microwave.
- Learning how natural household items can be powerful cleaning agents.
- Efficient and quick microwave cleaning hacks to fit any schedule.
- Adopting deep clean techniques for a comprehensive microwave overhaul.
The Importance of Regular Microwave Cleaning
More than 90% of homes in the USA have a microwave. Keeping it clean is more than just for looks. Cleaning and removing bad smells from your microwave is important for your health and its performance. Making sure your microwave works well and is safe is key to its daily use.
Health Risks of a Dirty Microwave
A dirty microwave might have bacteria due to uneven cooking, as the waves only go about 1 to 1½ inches into the food. Checking food temperature with a thermometer is one way to be safe. But, cleaning your microwave often is better for stopping germs. Even sleek microwave drawer ovens need regular cleaning to avoid being germ hotspots. It’s important to clean up food spills quickly to stop bacteria and keep your food safe.
Efficiency and Energy Consumption Implications
Ignoring your microwave’s cleanliness can make it work harder. Leftover food bits can take in the energy, making cooking take longer and using more electricity. Also, blocked vents can make your microwave work poorly and could even be a fire risk. Cleaning your microwave the right way, especially if it has special surfaces, helps it run better.
Recognizing When Your Microwave Needs Cleaning
It’s easy to tell when your microwave needs cleaning—if you see spills or it smells, it’s time. Cleaning right away is especially important for drawer microwaves because of their design. People often share their cleaning tips online, showing how vital a clean microwave is for a healthy kitchen.
| Cleaning Aspect | Maintenance Recommendations | Frequency |
|---|---|---|
| Exterior Surfaces | Use mild soap and water for precoated metal and glass. Stainless steel may require specialized cleaners. | As needed or weekly |
| Control Panel | Deactivate touch pads before wiping with a damp cloth. Avoid harsh chemicals. | After each use |
| Interior Cleaning | Wipe spatters immediately; use only mild soap to prevent surface damage. | After each use or daily |
| Odor Removal | Heat a mixture of water, lemon peel/juice, and cloves to neutralize odors. | As needed |
Essential Supplies for Effective Microwave Cleaning
Looking for the best way to clean microwave? The right tools and cleaning agents are key. With a well-planned microwave cleaning checklist, a chore turns into something quick and satisfying. First, gather all necessary supplies for an easy cleaning.
Gathering Your Cleaning Materials
Start by picking your cleaning toolkit. You need a microwave-safe bowl to create steam, and a spray bottle for the cleaning solution. Add paper towels for wiping and a soft cloth to avoid scratches. Don’t forget a sponge for tough spots.
Natural vs. Chemical Cleaning Agents for Your Microwave
Your choice may be simple kitchen items like dish soap or vinegar, or maybe commercial cleaners. Deciding between natural cleaners, like lemon and baking soda, or chemicals depends on your microwave’s state and your health concerns.
- A microwave-safe bowl for steaming
- Vinegar or cleaning solution
- Spray bottle for even application
- Paper towels for wiping down
- Microfiber cloth to polish without scratching
- Gentle sponge for scrubbing
With the correct supplies, any method you choose will get your microwave clean. It will be ready for your next meal preparation.
How to Clean the Microwave: Step-by-step to remove odors and residues
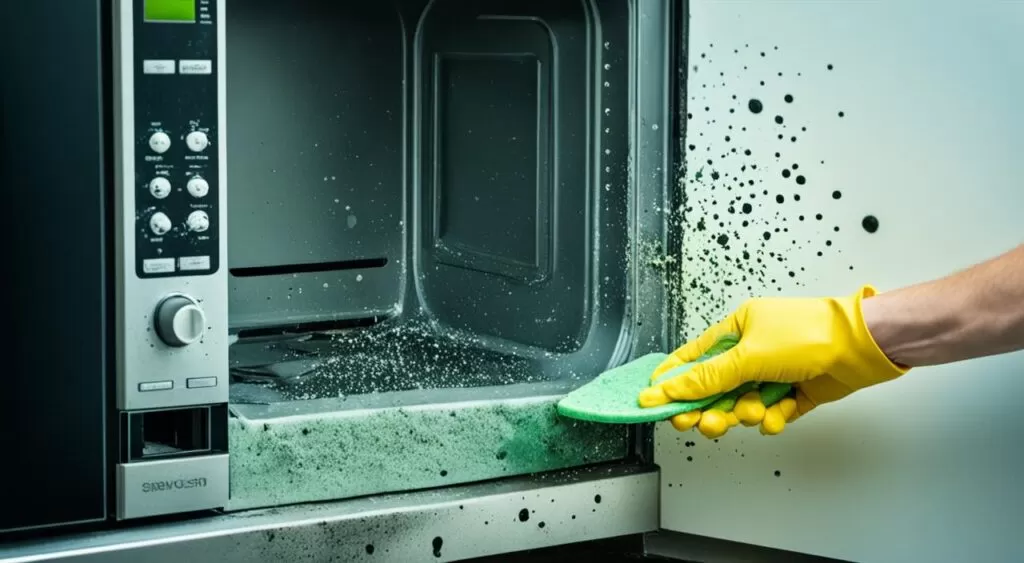
It’s easy to keep your microwave clean and fresh. Use the right microwave cleaning hacks to quickly clean residues and get rid of bad smells. Our step-by-step guide shows you how to take care of it regularly and well.
You should deep clean your microwave at least once a week, especially after big messes. For regular upkeep, follow this simple routine:
- Clean spills right away. This stops them from hardening and being hard to scrub off later.
- Every now and then, wash the microwave filter with warm soapy water and a soft brush to avoid grease build-up.
- Don’t forget to regularly clean the inside and outside of the microwave, including the door, buttons, and turntable.
Try these natural methods for a deep clean:
- Mix 1/2 cup water with 1/2 cup white vinegar. Heat it up until it boils, then clean the inside.
- Heat a bowl of water with lemon slices in the microwave. Let it stand to use steam and citric acid power. Then, clean the inside.
- Make a baking soda and warm water paste. Apply it inside the microwave. Heat to make steam, which loosens grime, then wipe away.
If you don’t use your microwave much, wiping it every few days prevents food residue build-up. Use natural ingredients like water, baking soda, vinegar, and lemon for cleaning. Warming vanilla extract in the microwave can leave it smelling great without harsh chemicals.
| Cleaning Ingredient | Method | Benefits |
|---|---|---|
| Vinegar & Water | Heat mixture, let boil, wipe | Dissolves grime, neutralizes odors |
| Lemon & Water | Heat lemon slices, let stand, wipe | Natural disinfectant, refreshing scent |
| Baking Soda & Water | Apply paste, heat, let sit, wipe | Scrubs away tough residue |
When cleaning, avoid harsh scrubbers. For stainless steel, use specific cleaners like Stainless Steel Magic. Flatbed microwaves are easier to clean than ones with turntables. For smells, use steam cleaning, mild detergents, or deodorizers like baking soda or coffee grounds.
Finally, be gentle in your cleaning. Let the microwave cool before cleaning. Use soft cleaners, not harsh ones. With these microwave cleaning hacks, your microwave will stay spotless and smell great.
How to Clean the Microwave with Common Household Items
Keeping a kitchen spotless often involves cleaning the microwave well. Experts say regular deep clean microwave actions keep it hygienic and working better. By following simple cleaning tips microwave lovers share, you can keep your microwave not only clean but also free of bad smells.
Using Vinegar to Dissolve Grime and Neutralize Odors
Vinegar is great for cleaning the microwave. Its acetic acid breaks down hard dirt easily. Make a mix of 2 cups water and 2 tablespoons vinegar. Heat this mix in the microwave until steam appears. Then, let it cool a bit before you wipe the inside with a cloth. This method leaves your microwave smelling clean.
Leveraging Baking Soda for Stubborn Stains
Baking soda is perfect for hard stains. Mix about ¼ cup of baking soda with 1½ tablespoons of water into a paste. Apply this paste to tough spots. It cleans without damaging your microwave. Let it sit for a few minutes, scrub gently, then wipe it off. For smells, leave open baking soda inside overnight.
Refreshing Your Appliance with the Power of Lemon
Lemon makes your kitchen smell nice and cleans your microwave too. Heat lemon and water together. This creates steam that loosens buildup, so it’s easy to clean. Using lemon water steam helps remove spills and splatters simply.
Clean your microwave’s inside once a week, and the outside as often as needed. Filters should be washed monthly with hot water and mild soap. Sometimes, use Dawn’s Platinum Powerwash for extra cleaning.
Experts also suggest airing out your microwave by leaving the door open after use. Avoid harsh cleaners like ammonia or bleach to keep it in good shape. Regular care and occasional deep cleans keep your microwave working and fresh.
Before cleaning, turn off the microwave and let it cool. This is a key safety tip from top electronics brands. Following expert advice helps avoid mistakes and makes cleaning effective and safe.
Microwave Cleaning Hacks for the Busy Individual
In the U.S., 85% of homes use a microwave every day. Keeping it clean is essential, not just optional. Following microwave cleaning hacks can extend your microwave’s life by 20%. Regular cleaning stops bad performance and dangerous germs. Here are some fast, efficient cleaning tips perfect for any busy life.
Quick Wipe-Down Techniques
Clearing spills right away can make cleaning easier and stop hard stains. Here are quick cleanup tips to remember:
- Always have a microwave-safe bowl of lemon juice or vinegar water ready. If spills happen, a quick heat-up can make debris easy to clean.
- Keep paper towels or a clean cloth close to clean messes quickly after heating.
- Regular cleaning after use can reduce odor build-up by about 80%.
Creative Uses of Microwave Heat to Aid Cleaning
The power of heat is a cleaning tips microwave lovers’ secret. Here are heated tips to make cleaning easier:
- Warm a mix of vinegar and water for 5-10 minutes for a thorough steam clean. It’s 30% cheaper than store-bought cleaners.
- Heated lemon juice works 20% better for the planet than chemicals. It also fights off stubborn odors.
- For hard grime, mix in dish soap. It’s effective against tough stains.
| Cleaning Agent | Benefit | Efficiency Bonus | Environment Impact |
|---|---|---|---|
| Vinegar & Water Solution | Cost-effective and powerful against grime | 15% more efficient in regular use | Saves money on commercial cleaners |
| Lemon Juice | Effectively neutralizes odors | Greatly lowers odor build-up risk | 20% kinder to the environment than chemicals |
| Dish Soap & Water | Quickly gets rid of grease and stains | Stops stubborn residue | Uses no harsh chemicals, safe for everyday |
Using these easy microwave cleaning hacks, you make your kitchen cleaner and your home greener. Just a bit of effort keeps your microwave and you at your best.
Deep Clean Microwave Techniques for a Comprehensive Clean
Most American homes have a microwave, so knowing how to clean it well is key. A deep clean makes it look better, work better, and be safer. It’s more than just wiping surfaces; it’s about deep cleaning to sanitize microwave spaces, getting rid of tough stains and splatters.
Handling Persistent Stains and Splatters
To deep clean microwave interiors well, start with a mix of 1/4 cup white vinegar and one cup water. Heat this solution in the microwave. The time depends on the microwave’s wattage: 1 to 1.5 minutes for 1,200 watts or more, and 2 minutes or more for 700 watts. After heating, keep the microwave closed for three minutes. This lets the steam loosen dirt. This method cleans and sanitizes where food is warmed. For hard spots, apply a baking soda paste for a deeper clean.
Ensuring a Sanitized and Disinfected Interior
After steam cleaning, use the vinegar solution to moisten a cloth and clean inside, especially where food splatters. Avoid leaving partly cooked food in the microwave to prevent health risks. Make sure reheated food hits 165 °F, as the USDA advises. Only use microwave-safe containers to keep your food safe from chemicals. This keeps the microwave disinfected.
Cleaning your microwave is about keeping food safe and the appliance in good shape. For the outside, use a damp paper towel with soap. Avoid harsh chemicals. Try cooking half a lemon in water for five minutes for a natural clean.
By using these steps, you deep clean microwave interiors and exteriors. This keeps it free from harmful germs and bad smells. It’s important for a healthy, enjoyable cooking space.
Best Way to Clean Microwave Turntables and Accessories
Keeping your microwave clean is key, especially the turntable and other parts you can remove. Cleaning them well not only keeps the appliance running smoothly. It also helps it last longer and keeps your food safe. Here are tips for maintaining these important pieces without hassle.
Separate Washing Instructions for Removable Parts
To get your microwave’s turntable and accessories spotless, clean them one by one. Use warm water mixed with gentle dish soap to cut through grease and food bits. This method is expert-recommended for its thoroughness.
Maintaining Turntable Functionality with Regular Cleaning
Don’t forget to clean the parts of your microwave that move, like the turntable. Keeping it clean ensures your microwave works well. Have a regular cleaning plan to stop dirt buildup, which can slow down your microwave.
For tough stains, mix ¼ cup of baking soda with 1½ tablespoons water into a paste. Let this paste sit on the stains for five minutes. Then, scrub gently with a sponge or cloth and rinse well.
- Disassemble: Take out the turntable and any parts that can be removed.
- Prepare the Cleaning Solution: Combine water and dish soap in equal parts.
- Soak and Scrub: Soak the parts if there’s a lot of buildup, then scrub softly.
- Rinse and Dry: Wash them off with clean water, and let them air dry or pat dry with a cloth.
- Reassemble: Put all the parts back in place once they’re dry.
Cleaning your microwave’s turntable and accessories can be budget-friendly. Items like the Progressive International Store Protective Hot Pad, the Tovolo Vented Collapsible Microwave Cover, and FitFabHome Microwave Liners are effective and don’t cost much. Melissa Metrano often shares easy cleaning tips that fit well into a tight schedule, loved by many of her followers.
| Cleaning Paste Composition | Time to Sit | Use Case |
|---|---|---|
| ¼ cup baking soda / 1½ tbsp water | 5 minutes | Stubborn stains / interior walls |
| Product | Cost | Purpose |
| Progressive International Store Hot Pad | $6.49 | Protect surfaces during cleaning |
| Tovolo Vented Collapsible Cover | $8.82 | Prevent splatters |
| FitFabHome Microwave Liners | $11.99 | Facilitate easier cleanup |
Last step in microwave care is to sanitize the keypad and handle, as they get touched a lot. For shared spaces, this is crucial. Don’t use vinegar on stainless steel to avoid damage, but a vinegar-water mix is fine for other parts or surfaces in the kitchen. Regularly wiping down these areas can make deep cleans less necessary and keep your microwave maintenance easy.
Tackling Tough Microwave Odors for a Fresh Scent
A microwave is a must-have in any kitchen, but bad smells can make it less appealing. A thorough cleaning process is crucial for keeping it smelling fresh. Our microwave cleaning checklist will guide you to remove odors microwave easily. Start by mixing 1 tablespoon of lemon juice with a cup of water. Microwave it for 2 to 5 minutes, then let it sit for 5 minutes. The heat and lemon work together to beat the bad smells.
If you prefer sweet smells, try 4 teaspoons of vanilla in water. Remember to adjust the steaming time based on your microwave’s wattage, which can range from 600 to 1,200. For tough smells, like burnt odors, mix baking soda with water. Microwave this solution for 5 minutes to tackle the smells.
- Repeat deodorizing as necessary until the odor is completely gone.
- Leaving small bowls of baking soda inside, or near the microwave, also helps absorb odors throughout the house.
Maytag is known for reliable appliances and sometimes offers deals on microwaves. If you have stubborn burnt smells, it’s best to clean your microwave well. If smells stay, think about getting professional help. Ignored odors can change how your food tastes and might point to bigger problems.
Regular care is key for your microwave. Clean it often with vinegar or all-purpose cleaners, focusing on areas you touch a lot like handles. Always check your manual for tips on cleaning filters and keeping the outside looking good. For a smudge-free finish, try using rubbing alcohol.
Consider this bit of history: the microwave became a kitchen staple fast after its release in the 1950s. Keeping it free from smells ensures your food tastes as it should. Stick to a three-step cleaning routine: empty it, clean inside, then the outside, with safe cleaners like Soft Scrub®. With a little effort and these tips, you’ll keep your microwave smelling great and ready for cooking.
Maintaining a Sparkling Exterior: Cleaning the Microwave’s Outside
Cleaning the outside of the microwave is as crucial as cleaning the inside. It helps keep your appliance looking good. The door, handle, and control panel get dirty with fingerprints and splashes. Here are cleaning tips microwave lovers will find useful for a shiny finish.
Polishing Doors and Handles for a Smudge-free Finish
To get a smudge-free finish on doors and handles, a simple cleaning method works wonders. Use a mix of mild detergent or vinegar with water. It’s best to clean with a soft cloth to avoid scratches and get a polished look.
- Prepare a mild detergent or vinegar solution in a spray bottle.
- Lightly mist the solution onto the door and handle.
- Wipe down with a soft, lint-free microfiber cloth using circular motions to avoid streaking.
- Dry with a clean cloth to prevent water spots and to add shine.
Cleaning Tricks for Control Panels and Vents
Control panels and vents can collect dust and food particles. But, they’re less likely to get smudges. Here are some cleaning tips microwave owners can follow for these areas:
- Use a damp, soft cloth to gently wipe the control panel. Avoid spraying directly to prevent moisture from getting into the electronics.
- To clean vent grills, use a soft-bristled brush. This can remove any trapped debris or dust.
- Finish by wiping with a barely-damp cloth and immediately dry it. This prevents moisture buildup.
Keeping your microwave’s exterior clean might seem minor but it makes a big difference in your kitchen’s look. Using these cleaning tips microwave routines in your regular cleaning can help. It ensures the microwave looks as clean on the outside as it is on the inside. This is the best way to clean the microwave, creating a tidy and healthy kitchen.
Conclusion
Keeping your microwave clean and efficient is key to its longevity and performance. The cleaning tips shared are easy to follow. They let users find perfect methods for their lifestyle and microwave care. You can use natural ingredients like vinegar and lemon or baking soda for cleaning.
Cleaning your microwave weekly and following the maker’s guide for certain parts is crucial. The turntable, where food bits and spills gather, is easy to clean by hand or in the dishwasher. Using a mix of white vinegar and water or baking soda with warm water helps to steam away the dirt. This makes your cleaning efforts more effective and keeps your microwave working well.
The need for proper appliance maintenance was highlighted by a 2010 EPA report. It showed that small appliances, including microwaves, added 1.6 million tons of waste with little recycling. Microwaves last about seven to ten years. Good care and correct disposal help reduce environmental harm. By cleaning our microwaves well, we extend their life and support eco-friendly living. This helps protect our planet. Let’s ensure our microwaves are clean, efficient, and environmentally friendly.
FAQ
What materials do I need to effectively clean my microwave?
To clean your microwave, you’ll need a few things. A microwave-safe bowl, a cleaning solution (like dish soap, vinegar, or a commercial product), and a spray bottle are essential. You also need paper towels, a microfiber cloth, and a sponge. Items like baking soda or lemon can also be helpful for deeper cleans.
How often should I clean my microwave?
Cleaning your microwave once a week is a good idea. It stops bacteria growth, keeps it smelling fresh, and helps it work better. If spills happen, clean them right away. For tougher messes or if you notice a bad smell, a deeper clean might be needed.
Can natural cleaning agents like vinegar and lemon really sanitize my microwave?
Yes, vinegar and lemon can clean your microwave well. Vinegar has acetic acid that kills germs and breaks down dirt. Lemon’s citric acid is a natural disinfectant. Both are great for getting rid of bad smells too.
What is the best way to tackle tough stains and residues in the microwave?
To remove tough stains, heat a mix of vinegar and water or lemon water in the microwave. This makes steam that loosens dirt. Next, put baking soda paste on the hard spots, wait a bit, then gently scrub with a sponge. Repeat if needed.
How can I quickly remove odors from my microwave?
For quick odor removal, heat water with lemon slices or a bit of vinegar. The steam cleans the air inside. If smells stay, put an open box of baking soda in the microwave overnight. It absorbs odors, making your microwave smell fresh.
Are there any special considerations for cleaning the microwave’s exterior?
When cleaning the outside, use a damp cloth and mild detergent or vinegar. Be careful with the door, handle, and control panel. Avoid using rough materials and strong chemicals. They can harm the surface or the microwave’s venting system.
Is it safe to use a sponge to clean my microwave?
Using a sponge is safe, but make sure it’s soft to avoid scratches. For hard stains, try a microfiber cloth or paper towels. Always squeeze the sponge well to get rid of extra water.
How do I deep clean my microwave’s turntable and other removable accessories?
Take out the turntable and any other parts that come off. Wash them with warm, soapy water and a sponge or cloth. Get rid of all food bits to keep them working right. Let them dry completely before putting them back.
Can mold grow inside a microwave, and how can I prevent it?
Mold can grow in your microwave if there’s food left and enough moisture. Stop mold by cleaning spills right away. Make sure it’s dry inside after use. Doing regular deep cleans also helps keep it mold-free.
Are there any microwave cleaning hacks for a busy individual?
If you’re short on time, a damp paper towel can quickly clean the inside. For more thorough cleaning, mix a half-cup of water with two tablespoons of vinegar or lemon juice in a bowl. Heat until it boils to steam-clean the interior. This loosens grime, making it easy to wipe away.

